On This Page
Building a new home in Tamil Nadu is the single best opportunity to plan for solar energy — and it is an opportunity that most homeowners miss entirely. The decisions you make during construction about roof design, electrical wiring, and structural provisions can save you 30% or more when you eventually install solar, and they cost a fraction of what retrofitting requires later.
This guide walks you through every provision you should make during construction so that your home is truly "solar-ready" from the day you move in.
Why Plan Solar During Construction?
The economics are compelling. Solar provisions during construction cost Rs.15,000-25,000. Retrofitting those same provisions into a completed home costs Rs.50,000-75,000 — and sometimes involves breaking walls, re-routing conduit, and modifying your distribution board.
Construction Phase vs Retrofit: Cost Comparison
| Provision | During Construction | Retrofit Cost | Savings |
|---|---|---|---|
| Conduit from terrace to meter room | Rs.2,000-3,000 | Rs.12,000-18,000 | 80-85% |
| Dedicated MCB slot in distribution board | Rs.500-800 | Rs.3,000-5,000 | 80% |
| Earth pit near inverter location | Rs.1,500-2,500 | Rs.5,000-8,000 | 70% |
| Structural reinforcement for panel load | Rs.5,000-8,000 | Rs.15,000-25,000 | 65% |
| Waterproofing before panel installation | Included in terrace waterproofing | Rs.10,000-15,000 | 100% |
| Inverter wall space with ventilation | Rs.2,000-3,000 | Rs.5,000-8,000 | 60% |
| Total | Rs.15,000-25,000 | Rs.50,000-75,000 | 65-70% |
Beyond cost savings, construction-phase planning ensures cleaner installation. No visible conduit running along exterior walls, no surface-mounted cable trays, no holes drilled through finished walls. The solar system integrates seamlessly into the building.
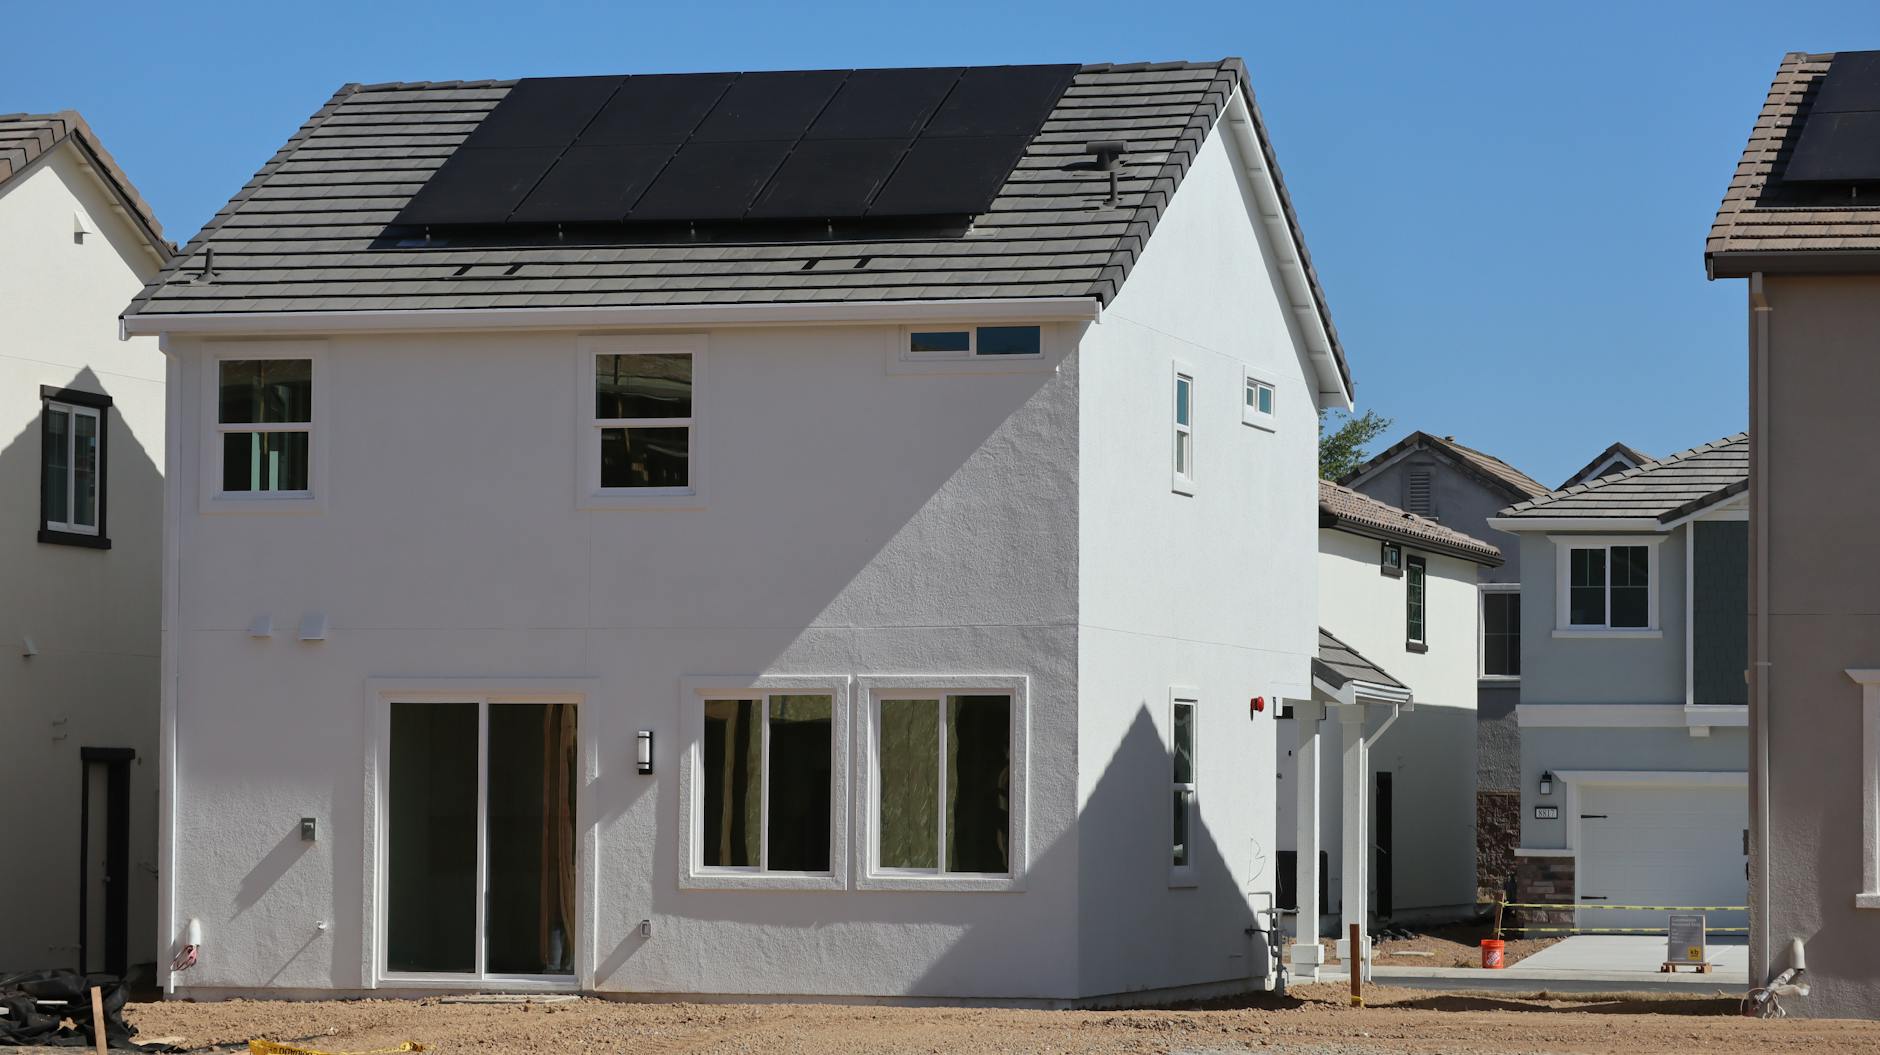
Roof Orientation: South-Facing is Ideal in Tamil Nadu
The orientation of your roof — specifically, the slope direction — directly affects how much energy your solar panels will generate.
The Science
In the northern hemisphere, the sun tracks across the southern sky. Solar panels facing true south receive the maximum direct sunlight throughout the year. In Tamil Nadu (latitude 8-13 degrees N), a south-facing panel surface generates 10-15% more energy annually than an east or west-facing surface, and up to 25% more than a north-facing surface.
Practical Recommendations
- Flat RCC terrace (most common in TN): This is the best scenario. Panels are mounted on tilted frames that face south regardless of the building's orientation. No roof design changes needed
- Sloped roof — new construction: If you are building a sloped roof, orient the main slope to face south. Even if the plot's road-facing side is north, the rear slope can face south
- Sloped roof — compromise: If architectural design does not allow a south-facing slope, east-facing is the next best option (captures strong morning sun), followed by west-facing. Avoid north-facing slopes entirely for solar
- Split-level roof: Consider designing one section of the roof as a flat terrace specifically for solar, even if the rest is sloped
Plot Orientation and Building Design
If you are still in the plot selection or architectural design phase:
- A south-facing plot (road on the south side) naturally leads to a building design where the rear terrace faces north — not ideal. In this case, plan for an elevated flat terrace section on the south side of the building
- A north-facing plot is actually better for solar: the building's rear faces south, giving you an unobstructed south-facing terrace
Roof Angle: 10-15 Degrees Optimal for Tamil Nadu
The tilt angle of your solar panels determines how directly they face the sun across seasons.
Optimal Angles by Location
| Location | Latitude | Optimal Annual Tilt | Range |
|---|---|---|---|
| Chennai | 13.08 N | 13 degrees | 10-15 degrees |
| Coimbatore | 11.01 N | 11 degrees | 8-13 degrees |
| Madurai | 9.92 N | 10 degrees | 8-12 degrees |
| Trichy | 10.79 N | 11 degrees | 8-13 degrees |
| Salem | 11.65 N | 12 degrees | 9-14 degrees |
For Flat RCC Terraces
Panels are mounted on aluminium or galvanised iron (GI) frames tilted at the optimal angle. No special roof design needed — just ensure the terrace is flat and level.
For Sloped Roofs
If you are designing a sloped tile or sheet roof:
- A roof slope of 10-15 degrees facing south is ideal — panels can be flush-mounted directly on the roof surface using mounting rails and tile hooks
- Steeper slopes (20-30 degrees) still work but generate 3-5% less annually
- Avoid very steep slopes (above 35 degrees) as they significantly reduce summer generation
Roof Material: RCC Flat Roof vs Sloped Sheet Roof
RCC Flat Roof (Recommended)
This is the standard for urban and semi-urban construction in Tamil Nadu, and it is the ideal surface for solar:
- Structural strength: RCC is inherently strong enough to bear solar panel load without reinforcement
- Flexibility: Panels can be oriented in any direction using tilted mounting frames
- Maintenance access: Easy to walk on, clean panels, and inspect wiring
- Waterproofing: Standard terrace waterproofing (done before solar installation) prevents any leakage issues
Sloped Sheet Roof (Metal/Tile)
Common in rural areas, factory buildings, and some traditional Tamil Nadu home designs:
- Metal sheet roofs: Panels are mounted using standing-seam clamps or L-foot brackets. No drilling into the sheet is needed with the right mounting hardware
- Mangalore tile roofs: Require tile hooks that slide under the tiles and anchor to the rafter. More complex installation but entirely feasible
- Clay tile roofs: Similar to Mangalore tiles but may require additional support depending on tile condition
Design Recommendation for New Construction
If you have the choice, design at least a portion of your roof as flat RCC terrace specifically for solar. A 300-400 sq ft flat section is sufficient for a 3-5kW residential system. The rest of the roof can be sloped for aesthetics or drainage.
Structural Load: Designing for Solar Weight
Solar panels and their mounting structures add weight to your roof. Planning for this during construction is far cheaper than structural reinforcement later.
Weight Calculations
| Component | Weight per m2 |
|---|---|
| Solar panels (standard 400W) | 12-14 kg/m2 |
| Mounting structure (aluminium) | 3-5 kg/m2 |
| Total solar load | 15-20 kg/m2 |
For context, a standard RCC roof slab is designed to carry a live load of 150-200 kg/m2. Solar adds only 15-20 kg/m2 — well within the structural capacity of any standard RCC construction.
What to Tell Your Structural Engineer
- Inform them that you plan to install solar panels on a specific terrace area
- Request that the slab in that area be designed for an additional 20 kg/m2 distributed load (this is a conservative figure)
- For flat terraces, no additional reinforcement is typically needed beyond standard construction
- For sloped roofs, ensure rafters in the solar zone are spaced at 600mm centres (standard) and are adequately sized for the additional load
Cost of Structural Solar Provisions
In most cases, the additional structural cost is zero to minimal for RCC roofs because standard construction already provides adequate capacity. For sloped roofs, specifying slightly heavier rafters or closer spacing might add Rs.5,000-8,000 to the roof cost.
Electrical Provisions During Construction
This is where construction-phase planning saves the most money and delivers the cleanest installation. These provisions should be specified in your electrical drawing before construction begins.
1. Dedicated MCB Slot in Distribution Board
Your home's main distribution board (DB) should include one spare MCB (Miniature Circuit Breaker) slot dedicated to the solar inverter connection.
- Specification: One 40A double-pole MCB slot (for systems up to 5kW) or one 63A double-pole MCB slot (for systems up to 10kW)
- Location: Near the top of the DB, clearly labelled "Solar"
- Cost: Rs.500-800 for the additional MCB slot during DB installation
2. Conduit from Terrace to Meter Room
This is the single most valuable provision. A PVC or GI conduit running from the terrace (where panels will be) down to the meter room (where the inverter and net meter will be) allows DC cables from the panels to reach the inverter without any surface-mounted cable trays.
- Specification: 40mm (1.5 inch) PVC conduit, embedded in the wall
- Route: From the terrace parapet wall, down through the building, to the ground floor meter room or inverter location
- Pull wire: Insert a nylon pull wire through the conduit during construction so cables can be pulled through later
- Cost: Rs.2,000-3,000 for conduit and labour during construction
3. Earth Pit Near Inverter Location
Solar systems require dedicated earthing. An earth pit near the proposed inverter location ensures proper grounding.
- Specification: One copper earth pit (standard 3m depth with GI pipe and copper plate)
- Location: Within 3 metres of the proposed inverter wall mount
- Connection: Run an earth wire from the pit to the inverter location through embedded conduit
- Cost: Rs.1,500-2,500 during construction
4. Inverter Wall Space
The solar inverter needs a wall-mounted location that is:
- Indoor or covered: Protected from direct rain and sun
- Ventilated: Inverters generate heat; avoid enclosed cupboards. A ventilated wall in the meter room, utility area, or garage is ideal
- Accessible: For maintenance and monitoring
- Size: Reserve a wall area of approximately 600mm x 400mm (for a standard string inverter)
- Power outlet: Install a 5A socket near the inverter location for the inverter's auxiliary power supply and monitoring equipment
5. Cable Tray Provision on Terrace
On the terrace, panels will be connected using DC cables that run to the conduit entry point.
- Provision: A shallow cable channel or embedded conduit along the terrace parapet, from the planned panel area to the conduit entry point
- Alternative: If not embedding a channel, simply ensure the parapet design allows for surface-mounted cable trays to be added later without affecting aesthetics
Shadow-Free Zone: Positioning Water Tanks, Staircases, and Other Structures
Shading is the single biggest performance killer for solar panels. Even partial shade on one panel can reduce the output of an entire string by 30-50%. During architectural design, you can eliminate future shading problems entirely.
Common Shade Sources on Tamil Nadu Terraces
- Overhead water tank: The most common offender. A 1,000-litre syntax tank on a 4-foot stand casts a shadow extending 6-8 feet to the north (in winter) and 3-4 feet in summer
- Staircase headroom: The staircase enclosure extending above the terrace level casts shade, especially in the morning and evening
- Parapet walls: Standard 3-foot parapets cast minimal shade but can affect panels mounted near the edges
- Neighbouring buildings: Future construction on adjacent plots can introduce shade
Design Recommendations
- Position the water tank on the north side of the terrace. Since the sun is always in the southern sky in Tamil Nadu, a north-side tank casts its shadow further north — away from the solar zone
- Position the staircase on the north or east side of the terrace for the same reason
- Designate a shadow-free zone on the south and centre of the terrace (minimum 300-400 sq ft) where no structures will be placed
- Keep parapet height to 3 feet on the south side of the terrace to minimise shade
- Check neighbouring buildings and plots: If the south-side neighbour has a taller building, your solar zone should be set back from that edge
Terrace Waterproofing
Do the terrace waterproofing before solar installation — always. This is not optional.
Solar panels are mounted on structures bolted to the terrace surface. If waterproofing is done after panel installation, the area under and around the panels cannot be properly waterproofed, leading to leakage.
During Construction
- Apply standard terrace waterproofing (polymer-modified cementitious coating or APP membrane) across the entire terrace, including the designated solar zone
- Allow the waterproofing to cure fully before any solar mounting work
- If you are installing solar immediately after construction, coordinate with your solar installer so that mounting bolt locations are sealed with waterproof sealant
Cost
Terrace waterproofing is a standard construction item. There is no additional cost for solar — you simply ensure it is done properly and before solar installation.
Sanctioned Load: Apply for Adequate Load During EB Connection
Your TANGEDCO sanctioned load determines the maximum power you can draw from the grid — and it also determines the maximum solar system size you can install under net metering.
TANGEDCO Net Metering Rules
- Solar system capacity cannot exceed your sanctioned load
- If your sanctioned load is 3kW, your maximum solar capacity is 3kW
- If you want a 5kW solar system, you need at least 5kW sanctioned load
Recommendation for New Construction
When applying for your TANGEDCO EB connection for the new house:
- Apply for a sanctioned load that matches your planned solar capacity, not just your current consumption
- A 5kW sanctioned load is recommended for most 3-4BHK homes (even if initial consumption is lower)
- A 10kW sanctioned load is recommended for large villas or homes planning for EV charging
- The cost difference between 3kW and 5kW sanctioned load is typically Rs.2,000-5,000 in connection charges — a trivial amount compared to the flexibility it provides
Net Metering Readiness: Bi-Directional Meter Space
TANGEDCO's net metering scheme requires a bi-directional meter to be installed at your premises. This meter replaces (or supplements) your standard energy meter.
Provision During Construction
- Ensure your meter board has space for two meters (standard meter + bi-directional net meter)
- The bi-directional meter is the same physical size as a standard meter
- TANGEDCO installs the bi-directional meter as part of the net metering approval process — you just need to ensure there is physical space for it
Builder Checklist for Solar-Ready Homes
If you are a builder or working with a contractor, use this checklist to ensure every new home is solar-ready:
Structural
- RCC terrace slab designed for additional 20 kg/m2 load in solar zone
- Shadow-free zone of minimum 300 sq ft identified on south/centre terrace
- Water tank positioned on north side of terrace
- Staircase headroom positioned to minimise south-side shadow
Electrical
- 40mm PVC conduit from terrace to meter room (with pull wire)
- Dedicated MCB slot (40A or 63A DP) in main distribution board
- Copper earth pit within 3m of proposed inverter location
- Earth wire conduit from pit to inverter location
- 5A power socket at proposed inverter wall location
- Meter board space for bi-directional net meter
Terrace
- Full terrace waterproofing completed before any solar work
- Cable channel or conduit provision along parapet to conduit entry point
- Parapet height on south side limited to 3 feet
EB Connection
- Sanctioned load applied at minimum 5kW (or matching planned solar capacity)
- Three-phase connection recommended for systems above 5kW
Estimated Total Cost of Solar-Ready Provisions
| Item | Cost Range |
|---|---|
| Conduit (terrace to meter room) | Rs.2,000 - 3,000 |
| MCB slot in distribution board | Rs.500 - 800 |
| Earth pit and earth wire | Rs.1,500 - 2,500 |
| Inverter wall preparation | Rs.2,000 - 3,000 |
| Terrace cable channel | Rs.1,500 - 2,500 |
| Structural reinforcement (if sloped roof) | Rs.5,000 - 8,000 |
| Higher sanctioned load application | Rs.2,000 - 5,000 |
| Total | Rs.15,000 - 25,000 |
This Rs.15,000-25,000 investment during construction saves Rs.50,000-75,000 in retrofit costs and ensures a cleaner, faster solar installation when you are ready.
When to Actually Install Solar
You do not need to install solar immediately. The provisions above ensure your home is ready whenever you choose to go solar. However, our recommendation:
- Install during construction if budget allows: You get the PM Surya Ghar subsidy (up to Rs.78,000), start saving from day one, and avoid the hassle of a separate installation project later
- Install within 1-2 years: Panel and inverter prices are stable or declining slightly. Subsidy availability is confirmed through 2026-27
- Install before ECBC mandates: Expected 2027-2028, making solar provisions a compliance requirement for new construction
Use our solar calculator to estimate the right system size for your new home, or contact our team for a consultation during your construction planning phase. We work with architects and builders across Tamil Nadu to integrate solar provisions into new construction designs.
Ready to Go Solar?
Get a personalized solar quote based on your electricity consumption and roof area.
Related Articles
How to Read Your Solar Inverter Display: Understanding Every Parameter
A complete guide to understanding every parameter on your solar inverter display — from daily yield and total generation to voltage, frequency, and error indicators.
On-Grid vs Off-Grid vs Hybrid Solar | Tamil Nadu
A comprehensive comparison of on-grid, off-grid, and hybrid solar systems for Tamil Nadu — costs per kW, pros and cons, best-fit areas, a decision matrix across 10 factors, and a quick quiz to find your ideal system type.
Running a 2 Ton AC on Solar: Complete Sizing and Cost Guide
A 2 ton inverter AC needs 5 solar panels (2–2.5 kW) to run fully during daylight hours. This guide gives the exact panel count, inverter size, battery backup math, and real Tamil Nadu installation costs for 2026.